Chapter 1 — Getting Started
Welcome to DigitalClay3D — a procedural modelling tool for every 3D printer (FDM, resin, and ceramic LDM). This chapter covers what you'll see on first launch, how the interface is laid out, and the first ten minutes of "make a vase, see it on screen, export an STL."
What DigitalClay3D is for
DigitalClay3D produces 3D-printable ceramic vessels by combining four ingredients:
- A silhouette — drawn as a profile (revolution mode), as stacked cross-sections (lofting mode), or auto-traced from a reference image.
- A surface texture — one of 40+ procedural patterns, optionally composited via the visual node editor.
- A surface effect — Voronoi cut-through, hex lattice, gyroid, etc.
- A printer profile — Bambu Lab, Prusa, Eazao, WASP, 3D Potter, or a custom build plate.
Output is a watertight STL or OBJ ready for any clay slicer. Your design never leaves your machine; everything runs locally in the desktop app and in-browser in the demo.
First launch
When you open the application for the first time you'll see the default vase with the toolbar across the top and the sidebar tabs running down the left.
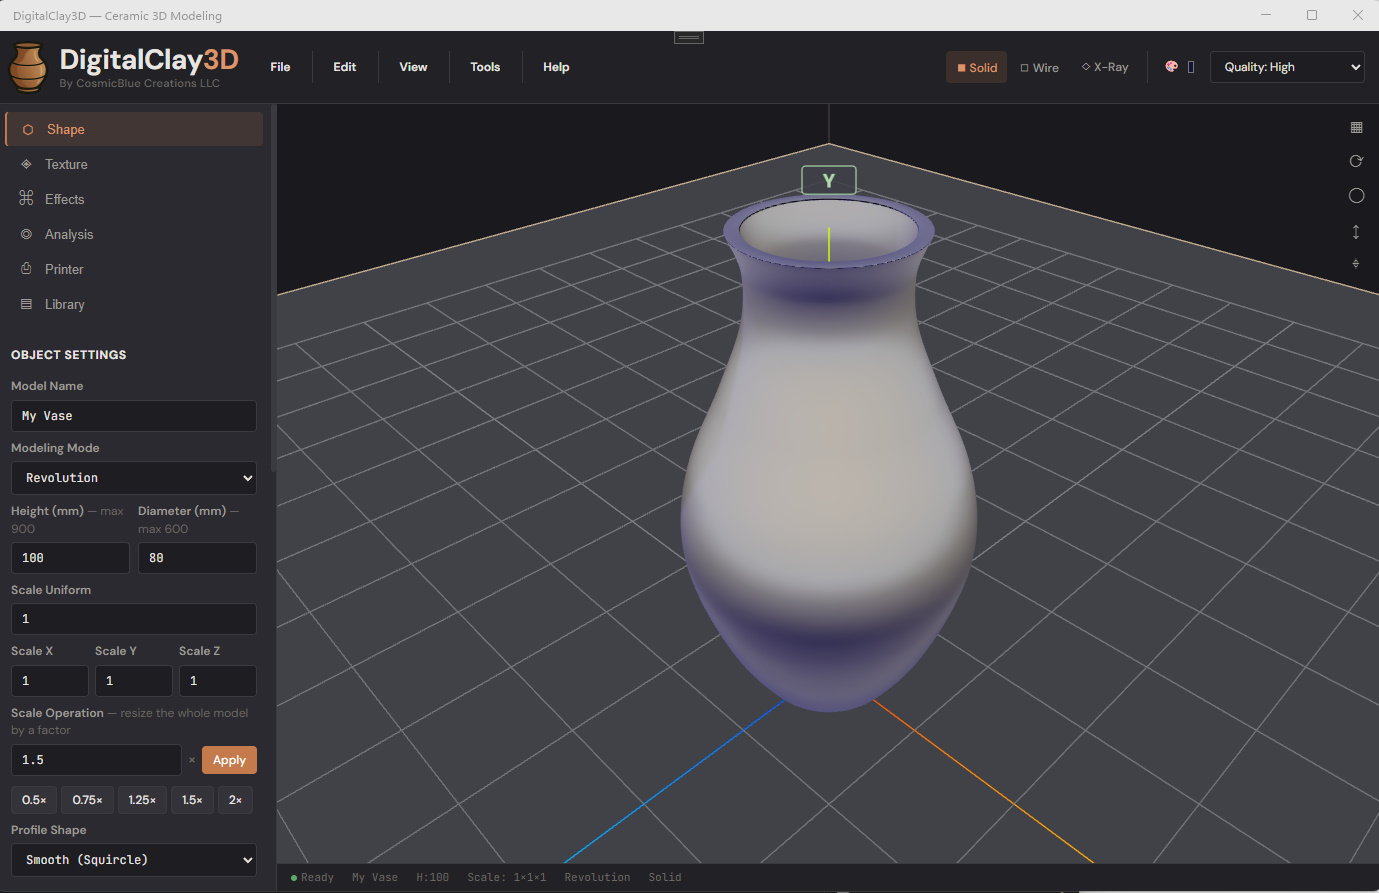
The four areas of the screen:
- Toolbar (top) — File / Edit / View / Tools / Help menus, plus the display-mode toggle (Solid / Wire / X-Ray), the surface-color picker, and the export-quality dropdown.
- Sidebar (left) — tab strip for the modelling workflow: Shape → Texture → Effects → Analysis → Printer (experimental) → Library.
- 3D viewport (centre) — Three.js scene with the model centred on the build plate. Drag to orbit; right-drag to pan; scroll to zoom.
- Status bar (bottom) — current model name, dimensions, modelling mode, and the most recent action's result.
The toolbar
The five menus on the left side of the toolbar:
| Menu | What's in it |
|---|---|
File 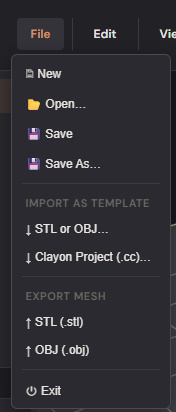 |
New, Open, Save / Save As, Import (STL/OBJ as template, Clayon .cc), Export (STL, OBJ), Exit. |
Edit 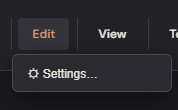 |
Settings (defaults, rendering, license, experimental toggles). |
View 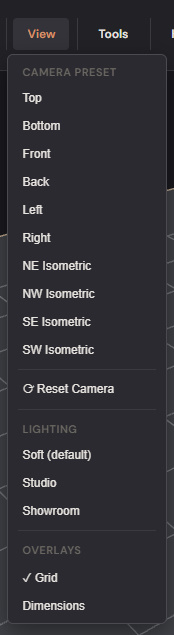 |
Camera presets (Top, Front, Iso, etc.), Reset Camera, Lighting modes (Soft / Studio / Showroom), Languages (EN / ES / FR / DE). |
Tools 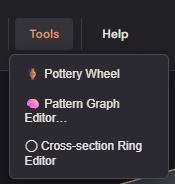 |
Pattern Graph Editor, Pottery Wheel (experimental). |
Help 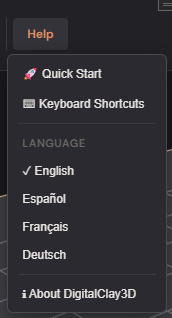 |
Quick start, Keyboard shortcuts, About. |
The right side of the toolbar carries the display-mode group (Solid / Wire / X-Ray), the surface-color picker 🎨 (sets the clay tint shown in the viewport), and the Quality dropdown (the mesh density used when exporting STL/OBJ — independent of the viewport quality).
The sidebar tabs
The sidebar is the modelling workflow, tab by tab. You can jump between them at any time — your work is preserved.
| Tab | What you do here |
|---|---|
| Shape | Pick a modelling mode (Revolution / Lofting / Intelligent), edit the silhouette, set wall thickness and base. |
| Texture | Choose a 1D or 2D pattern, tune amplitude and density, optionally launch the visual graph editor. |
| Effects | Apply a post-pass surface effect — Voronoi cut-through, hex lattice, gyroid, etc. |
| Analysis | Stability score and per-region warnings (top-heavy, thin walls, sharp overhangs). |
| Printer | (experimental) Layer-by-layer toolpath simulation with gravity-aware droop prediction. |
| Library | Save / load named project snapshots; each card shows a thumbnail. |
Make your first vase in five minutes
- File → New to start clean. The default model is a 200 mm tall, 150 mm diameter revolution vase on a Bambu X1 build plate.
- In the Shape tab, drag the small dots on the profile editor to change the silhouette. The 3D viewport updates live.
- Switch to the Texture tab, click any 2D pattern thumbnail (try Spike or Hexagonal), and dial the Texture Amplitude slider until the surface looks right.
- Optionally hop to Effects and pick Voronoi with Cut Through on for an open-lattice vase.
- File → Export → STL — pick a folder (or it'll go to Downloads on web), open the STL in your slicer, and print.
That's the whole pipeline. Every chapter that follows is a deeper look at one of those steps.
What to read next
- Chapter 2 — Modeling Modes if you want to learn the different ways of building a silhouette.
- Chapter 4 — Surface Decoration if you want to dive straight into the texture system.
- Chapter 11 — Keyboard & Mouse Reference for the one-page reference card.